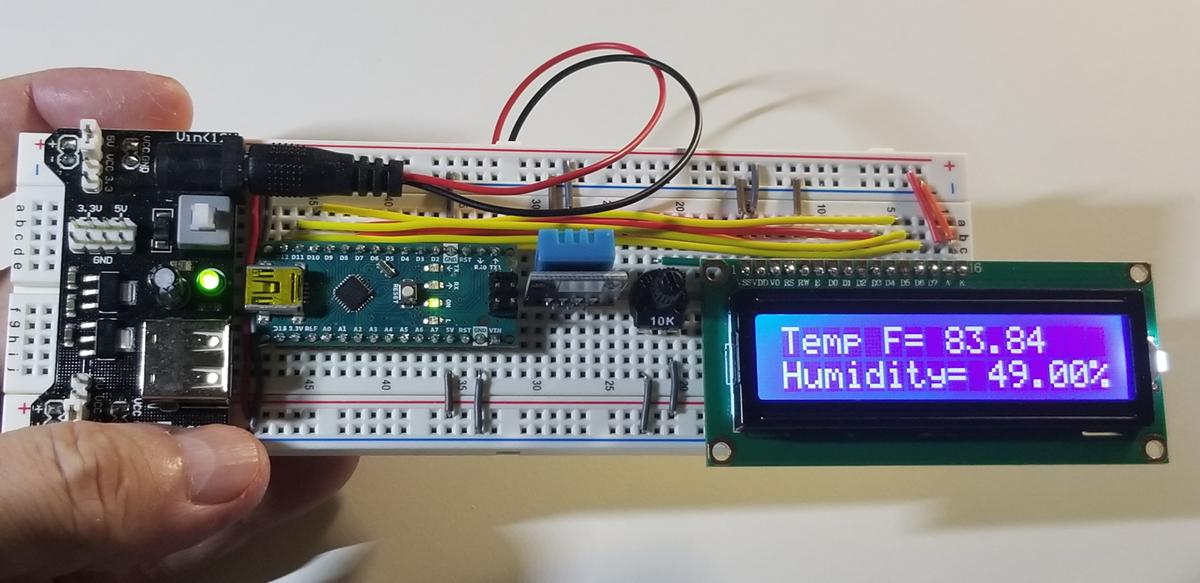
The purpose of this build is to become more familiar with how to develop a free-standing Arduino system using the Arduino Nano. The Nano is a smaller equivalent to the Arduino Uno, but with fewer interface options. It obviously occupies less space since it is a smaller footprint while having reduced overall dimensions. The project makes use of a DHT temperature and humidity sensor that interfaces with the Nano and it includes a 16×2 LCD display to indicate measurement results.
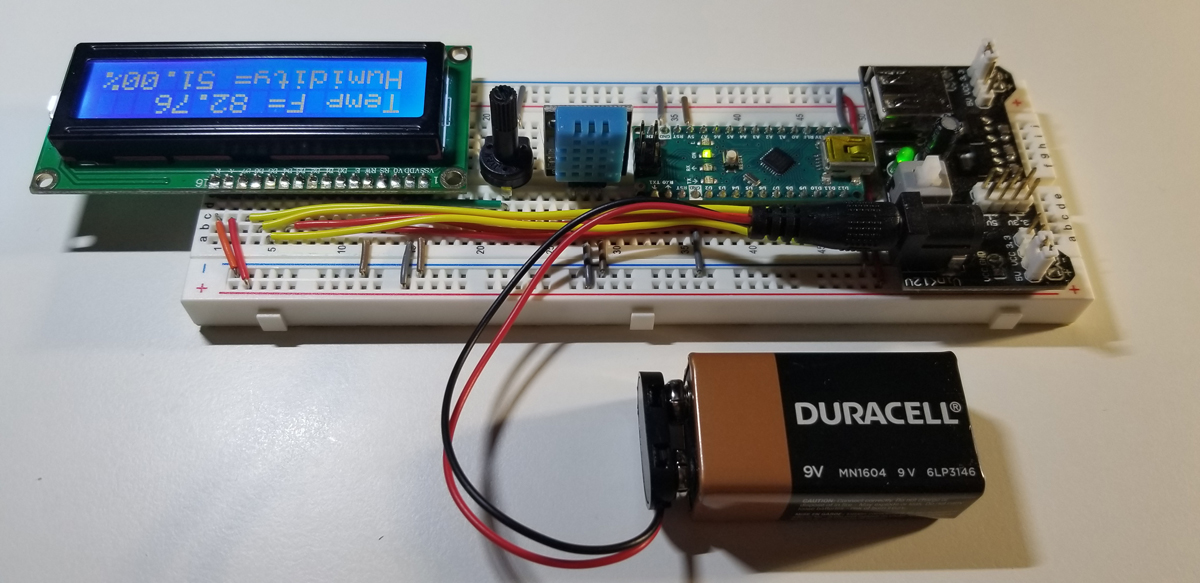
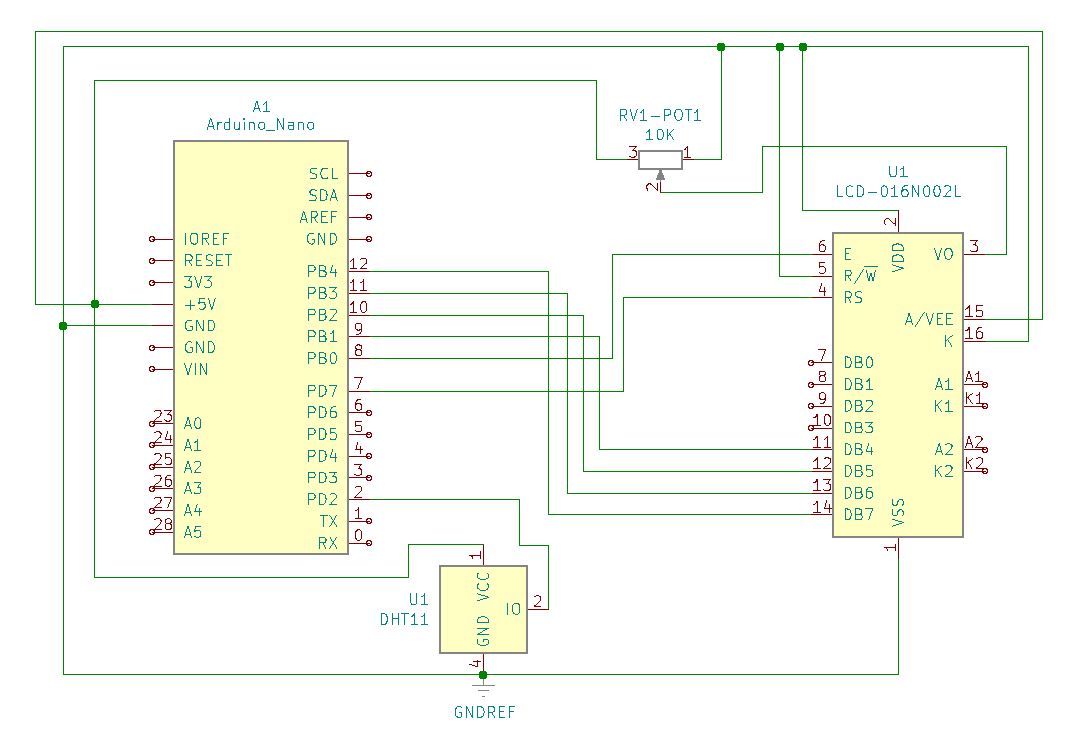
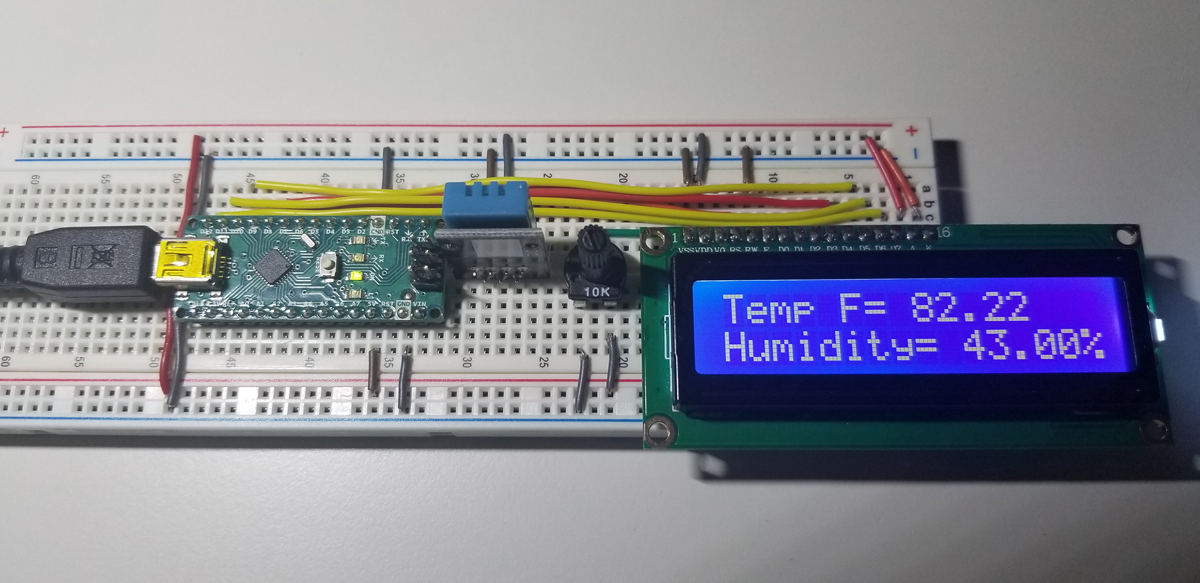
As temperature and humidity variations appear within the immediate environment, there are readings at the sensor read into the Arduino Nano. The system is configured and programmed to accept those readings and report them to the liquid crystal display. The ambient conditions surrounding the sensor are processed within the Nano to translate sensor data into usable information at the display.The system is powered by a 9V battery stepped down to a regulated 5VDC supply. The power module supports the Nano, DHT sensor, and LCD display. The power supply module’s detachability renders the Nano accessible for ease programming and alternative power through the Nano’s USB receptacle. This setup removes any permanent tethering with extended life through a power supply module’s USB-A receptacle if a power bank is used instead. The 10K-ohm potentiometer is a brightness control for the LCD display.The system schematic makes no use of passive components except for the single variable resistor (10K-ohm potentiometer). The direct connections between the Nano and display provide for desired simplicity during build and diagnostics. The DHT11 sensor pin-out provides for clarity about necessary connections at the Nano.
1602A LCD Display Pinout
Pin
Symbol
Function
1
VSS
Ground
2
VDD
+5VDC
3
V0
Contrast
4
RS
Register
5
R/W
Read/Write
6
E
Enable
7
D0
Data
8
D1
Data
9
D2
Data
10
D3
Data
11
D4
Data
12
D5
Data
13
D6
Data
14
D7
Data
15
A
Anode (+5VDC)
16
K
Cathode (Ground)
Arduino Setup:
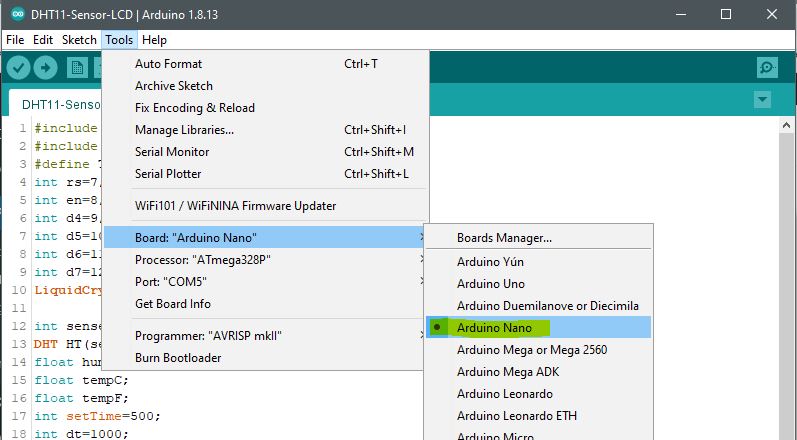
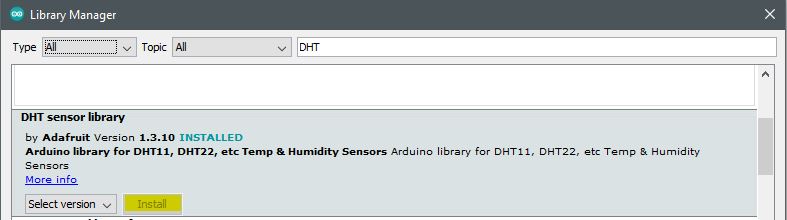
To program, edit, or update the firmware within the Arduino Nano, it is necessary to attach a USB connection from computer. The serial connection is made to update settings, configure the Arduino IDE (Sketch) The conventional structured programming setup applies to this project as with any other. The top of the program specifies libraries to support physical objects or devices in the project such as the DHT sensor and the LCD display in this case. Above the void set up procedure block, relevant variables are declared by data type (integer, float, etc). The void setup initiates devices, Arduino functions, or GPIO pins. The loop functions are the procedure itself that iterates to execute the main process by which the program operates. To set up and program the Nano, it is necessary to select it under the Board option from the Tool menu. The Port option within the Tools menu may require selection or setup as COM1 – COM5 (or some COM#) to establish a connection to a computer for programming and to run the Serial Monitor under this same Tools menu selection.To install relevant external device libraries (such as a temperature sensor, or display), it might be necessary to add the device to the Arduino Sketch folder on its host computer (usually C:\Users\[name]\Documents\Arduino\libraries). An example to install or update a device library from the Manage Libraries selection of the Tools Menu option, provides a dialog box to search by library name or description. In this example, “DHT” is keyed in to find the temp & humidity sensor for installation. Once the Arduino Sketch IDE is set up and configured with the correct board, serial COM connection, and relevant libraries, the code becomes operable and the serial monitor confirms proper use and setup (if/as applicable).
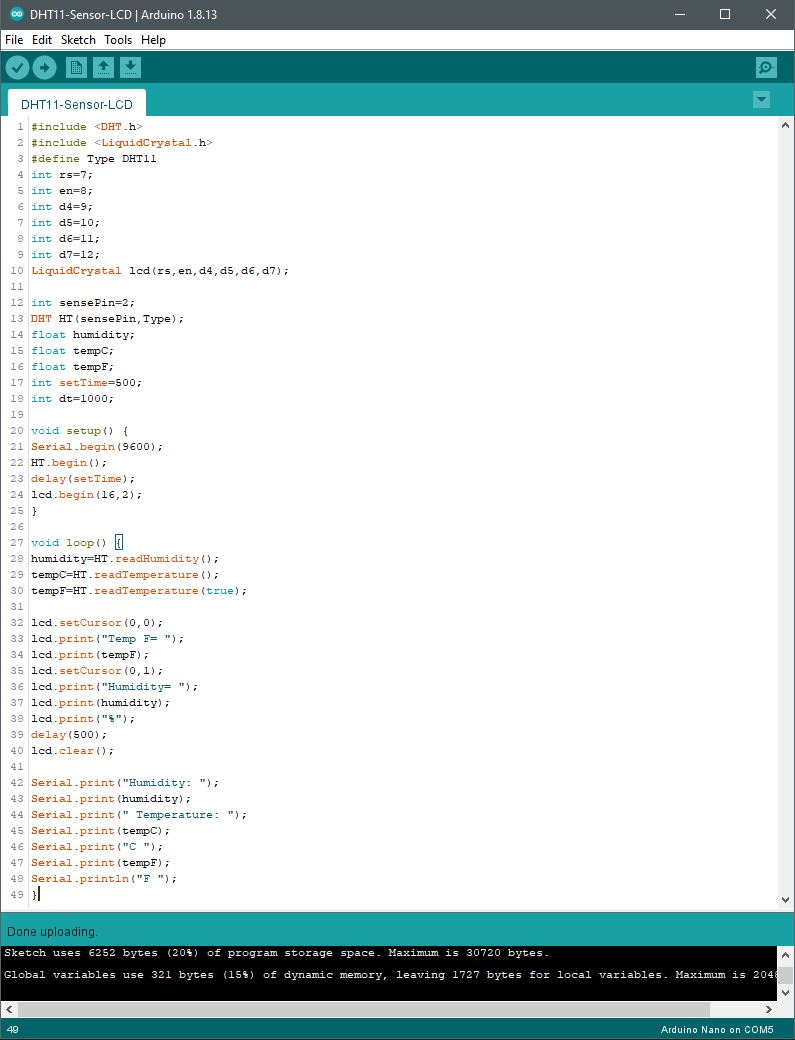
Code Setup:
#include <DHT.h> #include <LiquidCrystal.h> int rs=7; int en=8; int d4=9; int d5=10; int d6=11; int d7=12; LiquidCrystal lcd(rs,en,d4,d5,d6,d7);
int sensePin=2; DHT HT(sensePin,Type); float humidity; float tempC; float tempF; int setTime=500; int dt=1000;