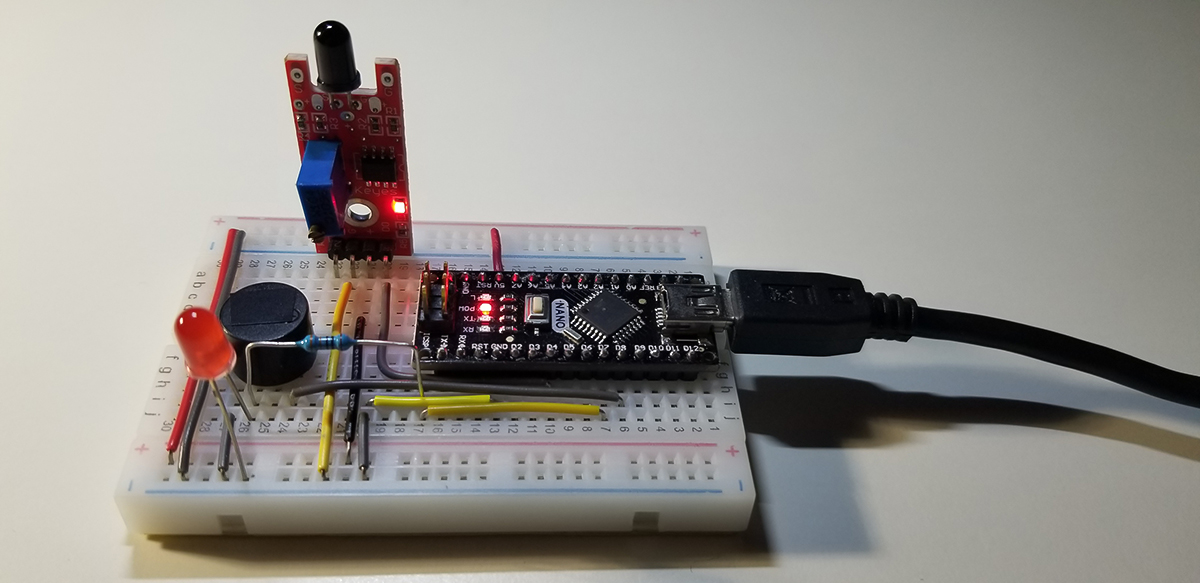
An Arduino Nano is set up in this project to run a flame detection sensor as a small fire alarm system. The system uses a small active buzzer (muted) and an LED to both simulate an alarm condition with the presence of fire in proximity to the flame detector. The Nano was chosen in this project to support any desire for portability or placement into a container that has an internal and temporary battery back up.
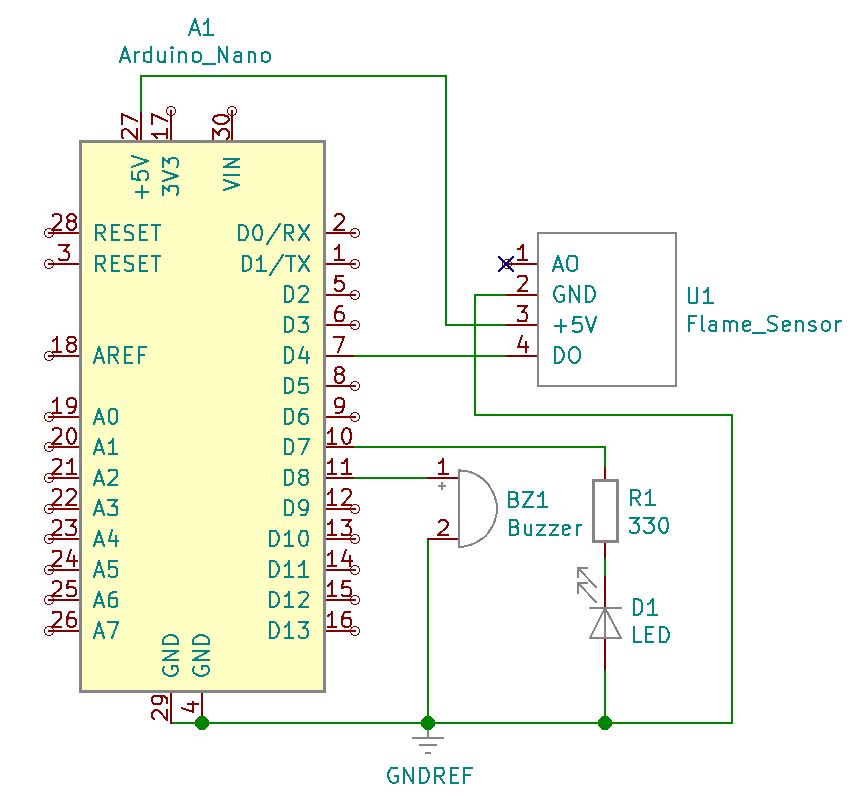
The buzzer and LED are visual and audible indicators to simulate an event trigger such as a relay closure to suppress a fire, or shut off a fuel pump. The sensor assembly itself consists of an infrared receiver (IR photodiode), an LM393 op-amp, an SMD power LED, an SMD fire presence LED, a 100k-ohm trim pot, and various resistors for the LED and to compose the op-amp circuit. The trim pot provides and adjustment setting for flame sensitivity at nearby or farther distances.
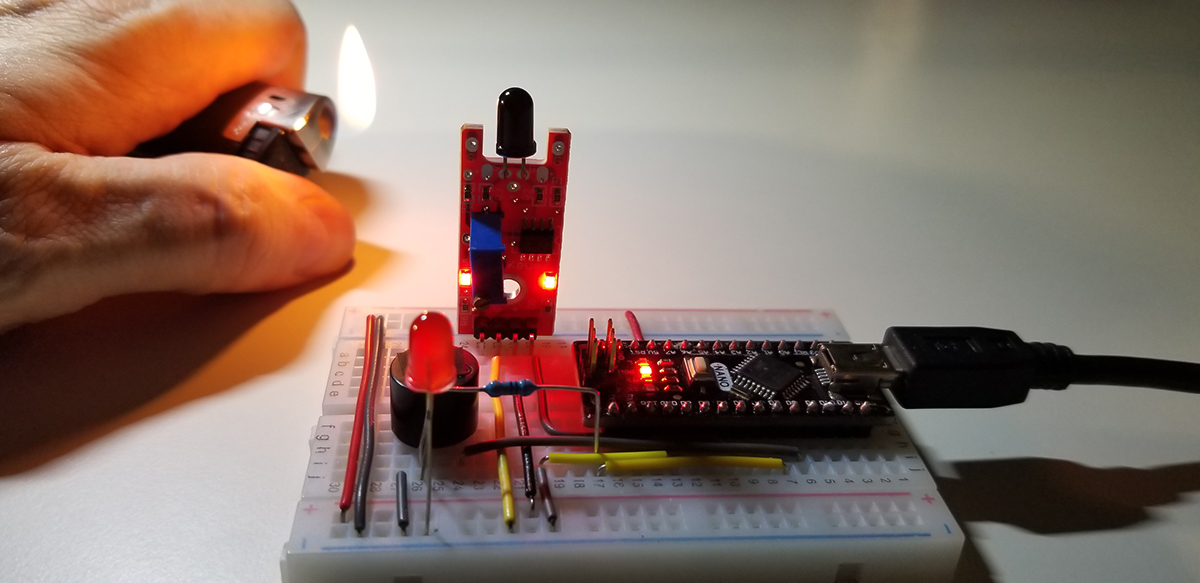
When the flame sensor detects the presence of fire, its D0 pin produces a logic HIGH output voltage that in turn is read into the Arduino GPIO input pin (pin D4). If there is no flame within proximity of the sensor, the detector returns its D0 output pin to an active LOW state. Where again the Arduino reads that change as an input and interprets the condition for a different event (alarm off, light off, event trigger(s) back to normal).
Project Schematic:
In addition to various jumpers, the project requires a small collection of common and readily available components. Their connections illustrated in this schematic diagram how to connect the various components together using jumper wires. The Arduino unit itself requires its own USB plug to give it and surrounding circuit components power. The same USB connection serves as the programming port to upload the code written to operate the system.
Project Review:
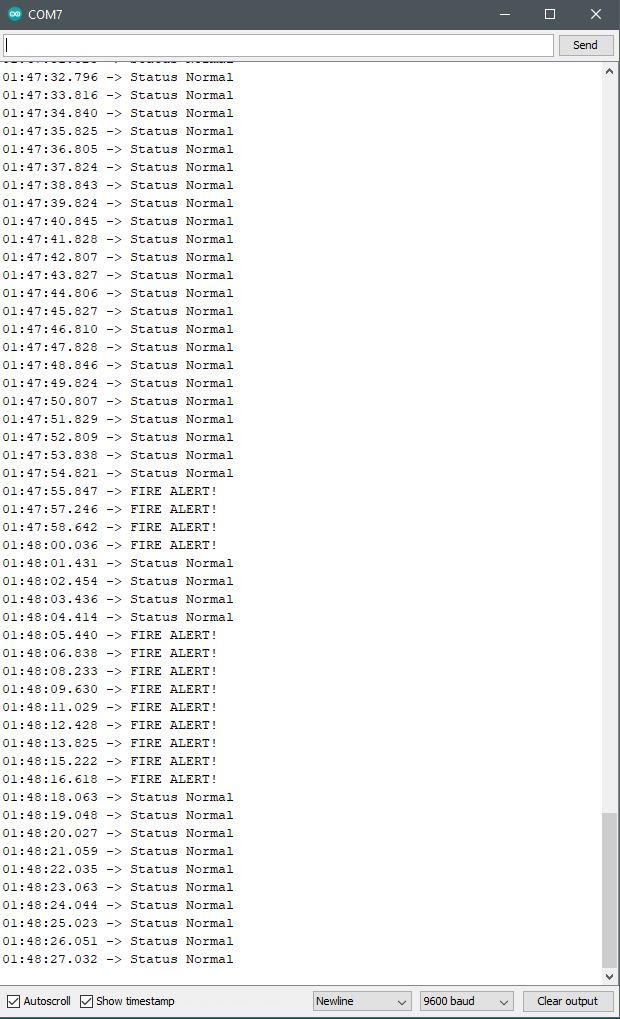
This short video provides a physical demonstration of how the flame detector operates. As a flame is put in nearby proximity of the sensor, it triggers a computer message, “FIRE ALERT” and it sounds off a buzzer alarm and illuminates a blinking light. The flame is moved shorter and longer distances away from the detector to visibly and audibly recognize the system’s detection threshold.
Arduino IDE:

Code Example:
int buzzer = 8;
int LED = 7;
int flame_sensor = 4;
int flame_detected;
void setup()
{
Serial.begin(9600);
pinMode(buzzer,OUTPUT);
pinMode(LED,OUTPUT);
pinMode(flame_sensor,INPUT);
}
void loop()
{
flame_detected = digitalRead(flame_sensor);
if (flame_detected == 1)
{
Serial.println(“FIRE ALERT!”);
digitalWrite(buzzer, HIGH);
digitalWrite(LED, HIGH);
delay(200);
digitalWrite(LED, LOW);
delay(200);
}
else
{
Serial.println(“Status Normal”);
digitalWrite(buzzer, LOW);
digitalWrite(LED, LOW);
}
delay(1000);
}


Comments are closed.