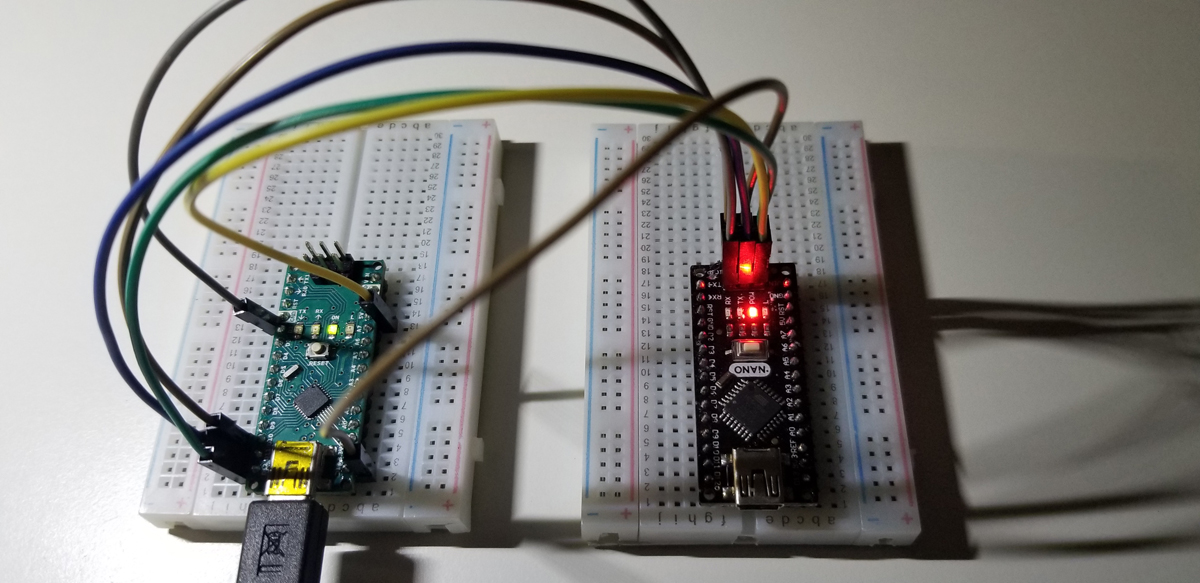
Arduino modules (in this case an Arduino Nano 3.0) may come from China without the hardware initialized with a suitable bootloader. Necessary for project work and programming, a bootloader configuration is necessary for an Arduino to connect to a local host computer and its Arduino Sketch IDE. To install a bootloader into the clone Arduino, it is necessary to connect it to a known functional Arduino unit (in this example another Nano) and configure the functional Arduino to set up and configure the bootloader code for the target Arduino clone.
Once the bootloader set up and programming is successful, the clone Arduino is prepared for standard project work and programming as desired.
Programming Method
Step 1 | Configure IDE and Load Arduino ISP
- Connect functional Arduino to the USB port on your computer. A USB-Mini male to USB-A male cable is necessary to make this connection. No USB connection is made to the clone Arduino.
- Open the Arduino IDE software.
- Select the correct COM port available from the Arduino menu (Tools > Port > Serial ports). Choose one COM port such as COM1, COM3, COM5, etc.
- Select the correct Arduino board from the Boards Manager menu option (Tools > Board: Arduino Nano (in this example).
- Open Arduino ISP to functional Arduino connected to the host computer via USB mini (Nano) to USB-A (computer). To open the Arduino ISP file select the correct example file (File > Examples > Arduino ISP). Once selected, the Arduino ISP code should open within the Arduino IDE as a Sketch.
- Upload the Arduino ISP code to the functional Arduino (Nano in this case).
- Unplug the functional Arduino USB cable and complete the six connections to the clone Arduino as described in step 2 below.
If the Arduino ISP code is needed separately (step 5 above), see the download button/link below.
Step 2 | Connect Arduinos
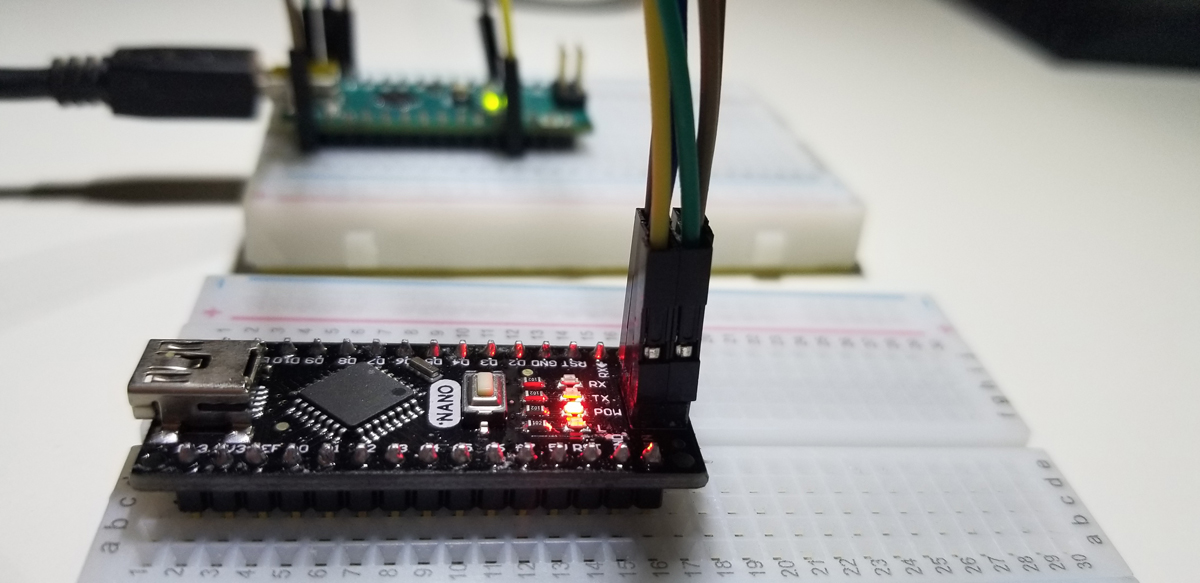
- Connect pin 1 on Arduino clone to D12 of functional Arduino.
- Connect pin 2 on Arduino clone to 5V of functional Arduino.
- Connect pin 3 on Arduino clone to D13 of functional Arduino.
- Connect pin 4 on Arduino clone to D11 of functional Arduino.
- Connect pin 5 on Arduino clone to D10 of functional Arduino.
- Connect pin 6 on Arduino clone to GND of functional Arduino.
Wiring Schematic
This diagram illustrates how to connect both a functional and clone Arduino together for bootloader programming to the clone. Important: connections D10 – D13 (digital pins 10-13 of the functional Arduino) are the connections to the clone Arduino. For example, do not connect reset or RST of the functional Arduino to the RST of the clone Arduino. Instead, connect D10 of the functional Arduino to pin 5 of the clone Arduino.
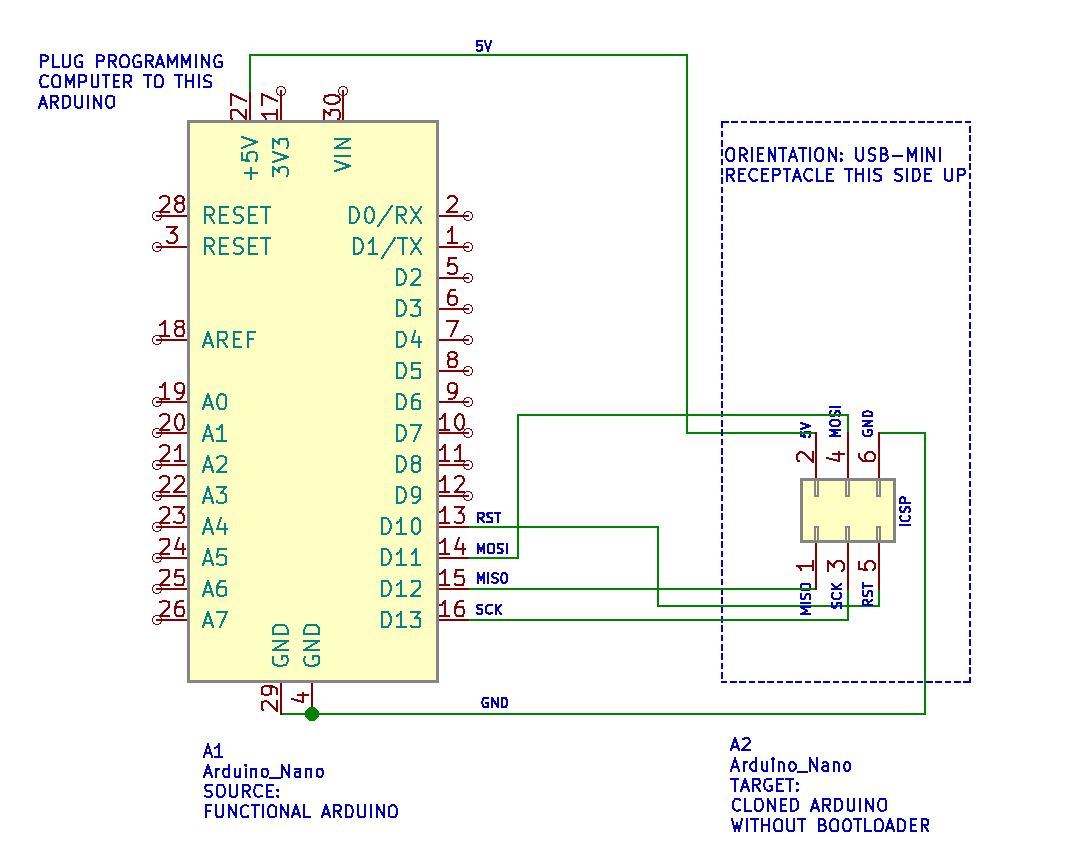
Proceed to step 3 below once all connections are made as described in step 2 above, or as illustrated in the wiring schematic above.
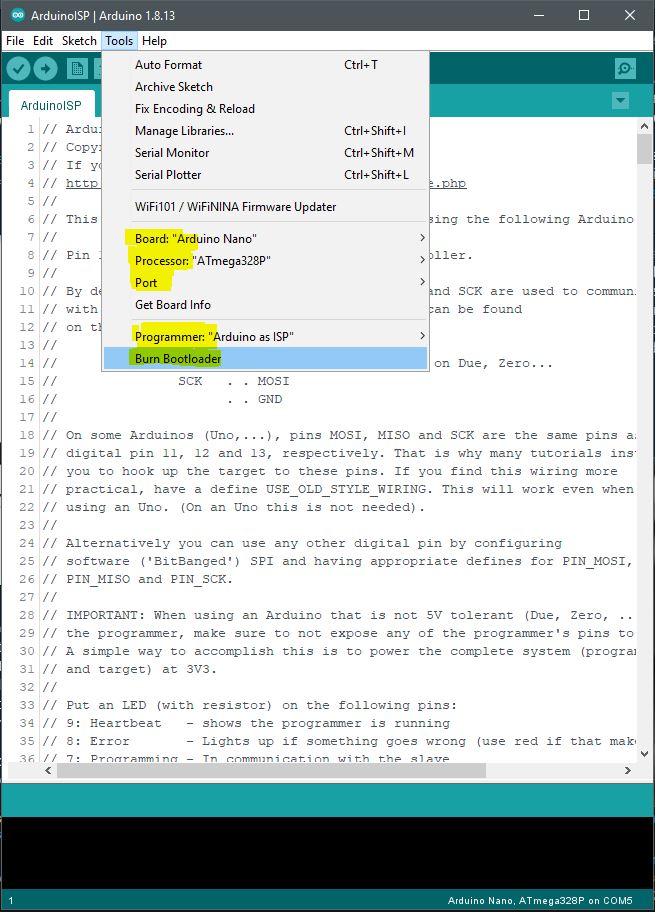
Step 3 | Code Load Bootloader
- Connect the USB cable to the functional Arduino again for power and programming. This is the same connection made earlier when the Arduino ISP was uploaded to the Arduino unit.
- Confirm the correct COM port is selected (Tools > Port > Serial ports). Choose one COM port such as COM1, COM3, COM5, etc.
- Select the correct Arduino board from the Boards Manager menu option (Tools > Board: “Arduino Nano” (in this example)).
- Select the correct processor from the menu (Tools > Processor > ATmega328P).
- Select the correct Arduino programmer from the menu (Tools > Programmer: “Arduino as ISP”)
- Select from the Arduino menu the bootloader utility (Tools > Burn Bootloader) to program the target clone Arduino with the bootloader file. Confirm from the Arduino IDE that the upload is completed (observe the “Done” message at the lower IDE window pane). The LEDs on both Arduino units flash during the bootloader programming and stop once the process is done.
Hardware Demonstration of Bootloader Transfer
This brief video demonstrates the LED activity before, during, and after the bootloader programming. The Arduino Nano on the left is the source and the Arduino Nano clone on the right is the target.


Comments are closed.